Nowadays ice makers are one of the most important appliances for households. If you are using an ice maker and see that your ice maker is malfunctioning in your refrigerator and then you decide to disconnect the ice maker. In this blog post, we will discuss about how to disconnect the ice maker.
Ice makers serve as a valuable enhancement for your refrigerator, ensuring a continuous provision of ice cubes to cater to your beverage and cooling requirements.
Nevertheless, there might arise situations when you find it necessary to disengage or extract your ice maker, whether it be for maintenance, replacement, or to create an additional storage room within your freezer.
There are several steps that you have to follow in order to disconnect your ice maker from your refrigerator. Here are the steps to follow:
Tools you will need
Before you begin disconnecting your ice maker, make sure you have the following tools and materials on hand:
Safety equipment: It includes protective gear for your eyes and hands, such as safety goggles and gloves.
Screwdriver: Typically, a flat-head screwdriver will be needed.
Adjustable wrench: Used for loosening and tightening compression nuts.
Pliers: Needle-nose pliers are useful for disconnecting water lines.
Towel or bucket: To catch any water that may spill during the process.
Also Read - Why my ice maker leaking water. Check the troubleshooting steps and do it properly.
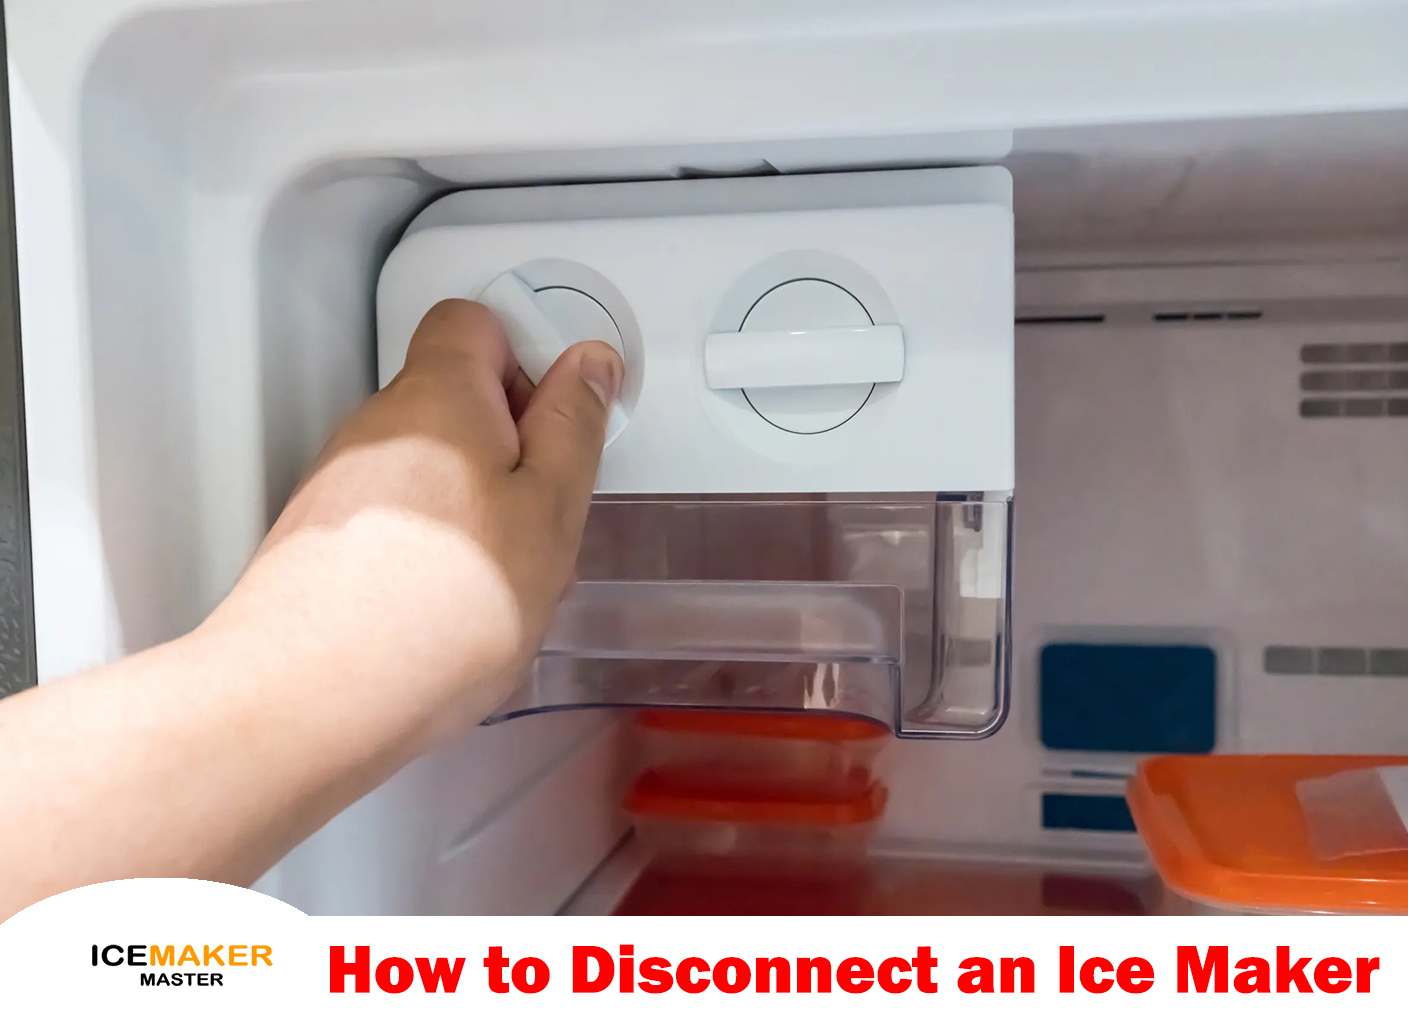
Unplug your refrigerator
Safety is paramount when working with water-connected appliances like ice makers. Before disconnecting your ice maker, unplug your refrigerator to eliminate the risk of electric shocks, fires, and accidents associated with exposed electrical components during the disconnection process.
Even when the appliance is off, electrical elements within the refrigerator may still carry a current. Unplugging the fridge is essential to ensure no electrical current is present in the wires and components you’ll interact with. This precaution significantly reduces the risk of electric shocks and fires, creating a safer work environment. Prioritizing safety through this simple act of unplugging is crucial when disconnecting an ice maker.
Locate the Water Supply
To begin the process of disconnecting your ice maker, your first task is to locate the water supply line that connects to your refrigerator. This water line is essential for providing the ice maker with the water it needs to create ice cubes. You will typically find this line attached to the back of the refrigerator, usually near the bottom.
In some refrigerators, this line might be connected to your home’s main water supply. If this is the case, you will need to locate the shut-off valve at the water source, which could be under the sink or in a utility room. Turning off the water at the source is necessary to ensure a safe disconnection without any water leakage or potential complications.
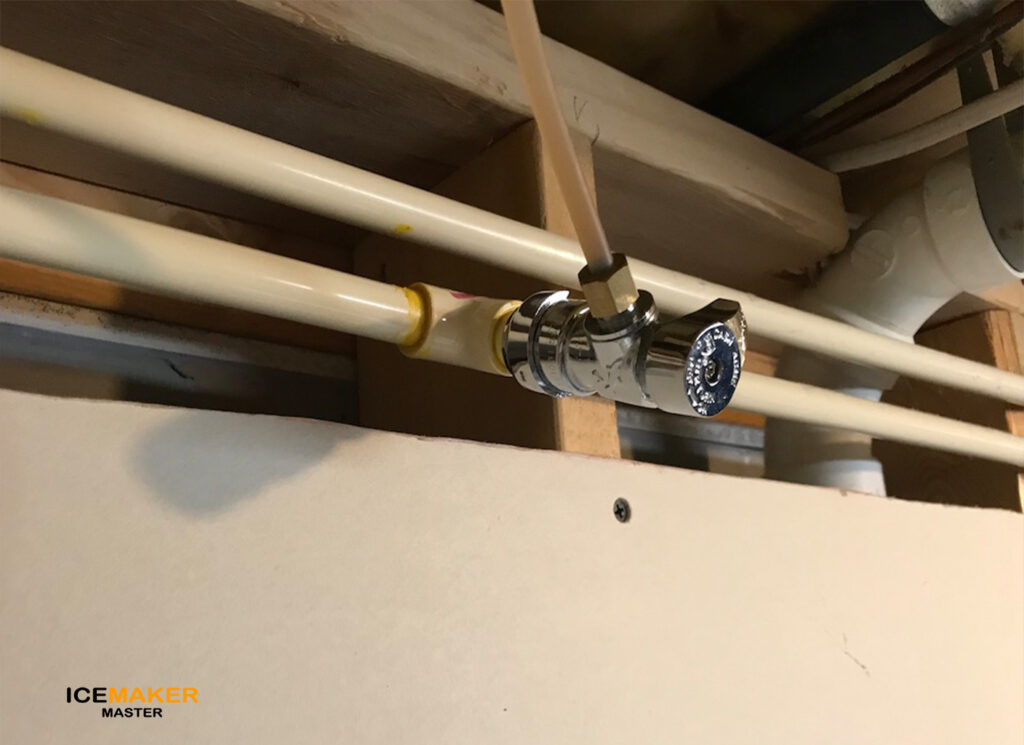
Turn off the water supply
In cases where the water line of your ice maker is connected to your home’s main water supply, it’s essential to turn it off before proceeding with the disconnection process. Usually, you’ll find a shut-off valve located in close proximity to the water line, commonly beneath the sink or somewhere nearby.
To shut off the water flow, simply turn the valve clockwise. This action effectively halts the water supply to your ice maker, preventing any further water from entering the system. Turning off the water source is a crucial precautionary measure to avoid water leakage, spills, or any mishaps while you work on disconnecting the ice maker. It ensures a smooth and safe disconnection process as well.
Disconnect the water line
As you proceed to disconnect the ice maker, your next step after turning off the water supply involves gently removing the water line that connects to the refrigerator. To do this, employ pliers to carefully loosen and detach the compression nut securing the water line to the fridge.
It’s essential to exercise caution while doing this, as some water may spill during the process. To prevent any mess or water damage, have a towel or bucket readily available to catch any drips.
By using pliers, you can manage a controlled and gradual removal of the compression nut, ensuring that you can proceed with the disconnection smoothly while minimizing any potential water spillage or inconvenience. This step is vital to ensure a tidy and hazard-free disconnection process.
For more information on how to disconnect water line in ice maker – click here.
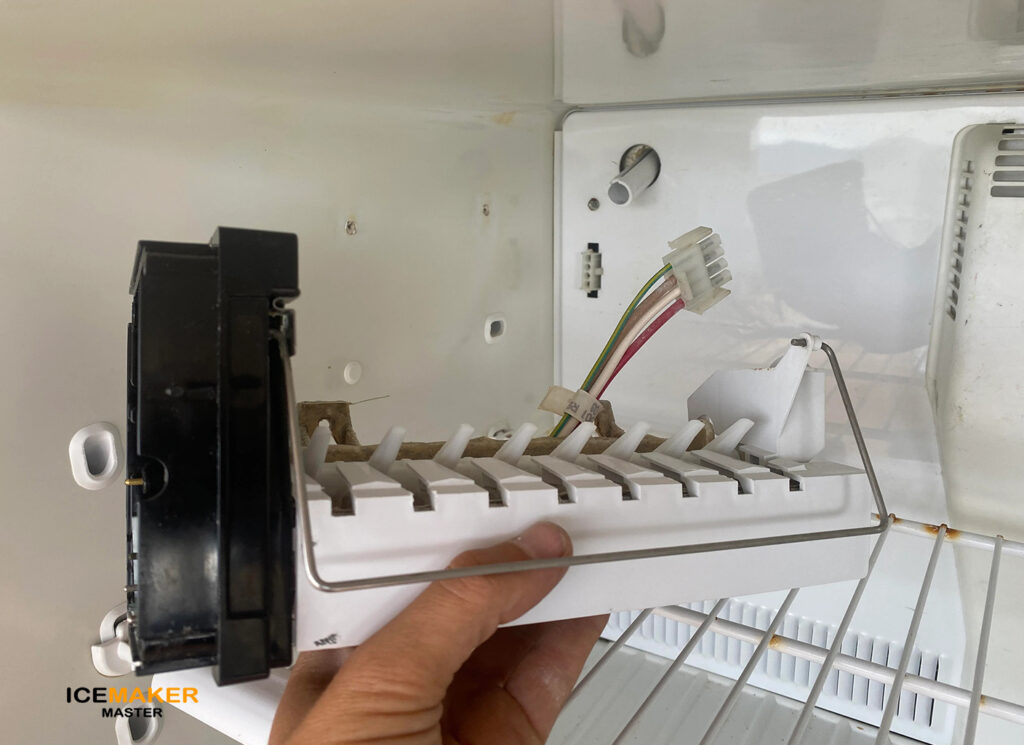
Remove the ice maker
In the process of disconnecting your ice maker, the next step involves removing the ice maker unit itself. Typically, this unit is secured in place with screws. Using a screwdriver, locate and remove these screws systematically. Once all the screws have been successfully taken out, exercise care as you gently lift the ice maker unit out of its housing.
This step is essential to ensure the complete detachment of the ice maker from your refrigerator. By removing the screws and carefully lifting the unit, you’ll create the necessary space for further disconnection and maintenance or for whatever purpose led to the need for ice maker removal. This careful and systematic process ensures a seamless and safe disconnection.
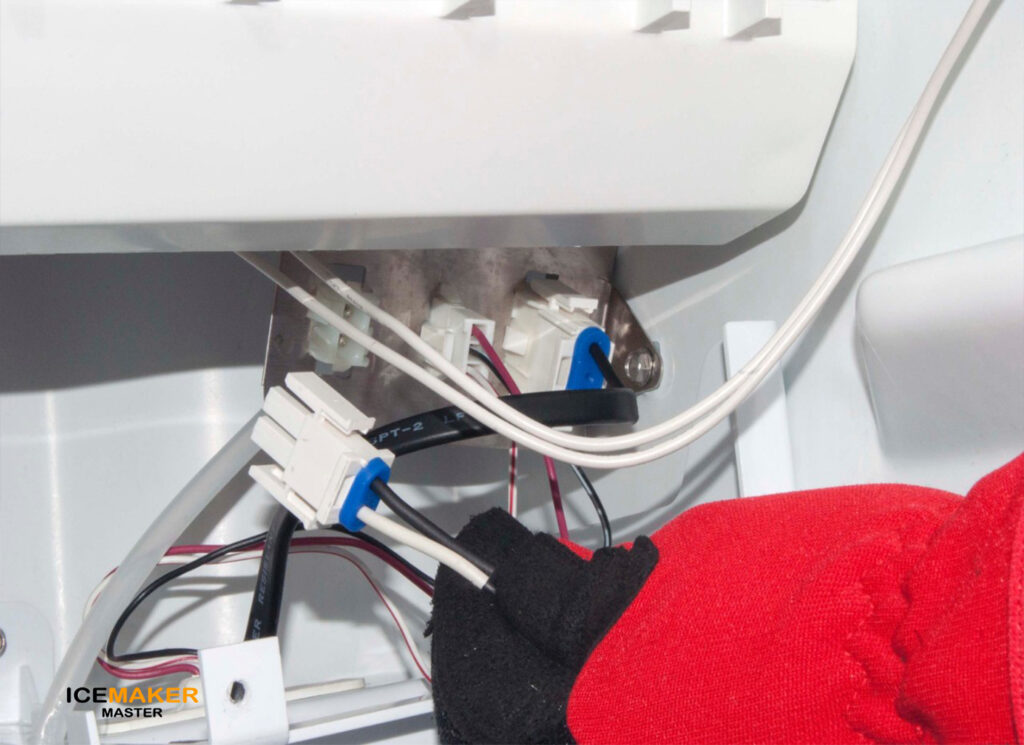
Disconnect the power
To continue the disconnection process, it’s crucial to disconnect the power supply to the ice maker. Typically, this involves disconnecting a plug that powers the unit. This plug is usually easy to remove, and it’s essential to ensure that the power connection is entirely disconnected before proceeding with any further steps.
This precaution is critical to prevent any accidental activation of the ice maker during the disconnection process, which could lead to unwanted ice production, water spillage, or potential electrical hazards. By safely and completely disconnecting the power supply, you ensure a controlled and secure disconnection of the ice maker from your refrigerator, allowing you to proceed with any necessary maintenance, replacement, or storage adjustments with confidence and safety in mind.
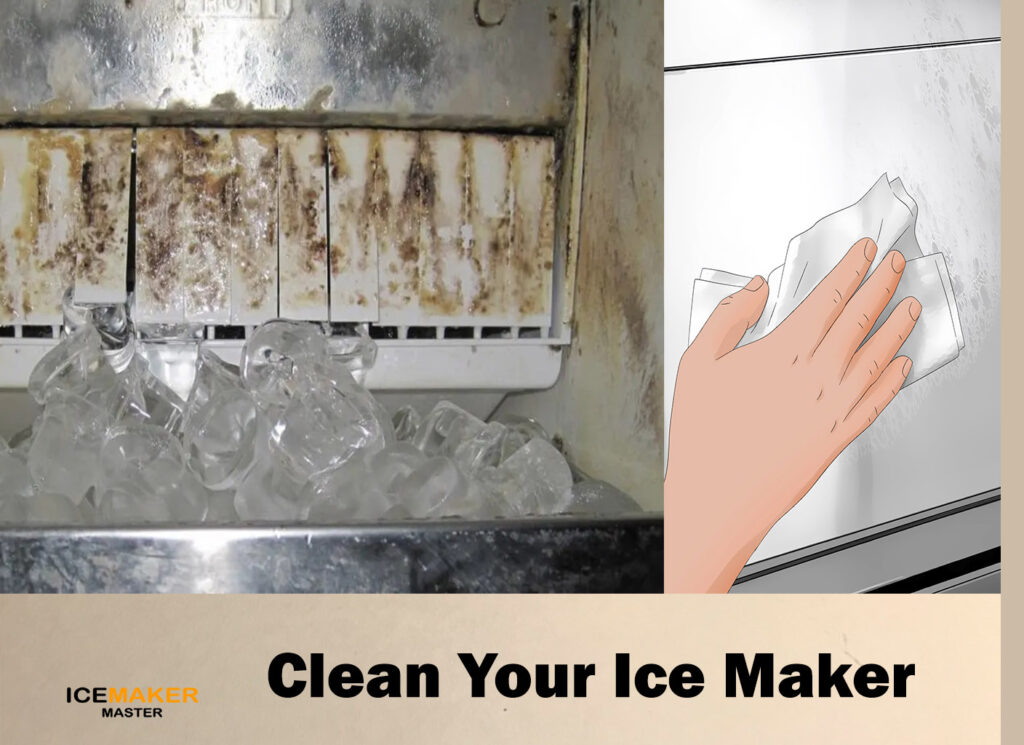
Reassemble and Clean (optional)
Once the ice maker is disconnected and you have completed the necessary tasks, whether for maintenance, replacement, or additional storage space, it’s essential to take a few final steps. Although this is optional. If you intend to keep the ice maker or reinstall it later, it’s best to store it in a cool and dry place to prevent any potential damage or moisture-related issues.
Before storing or reinstalling, ensure that the ice maker and the area where it was located are thoroughly cleaned. This step is crucial to prevent any buildup of dirt, grime, or potential contaminants that can affect the performance of the ice maker or the overall cleanliness of your refrigerator. A clean unit and environment ensure that the ice maker remains in optimal condition and ready for future use.
FAQ
Why would I need to disconnect my ice maker?
There are several reasons for which you need to disconnect your ice maker, including maintenance, replacement, or the need for extra space in your freezer. Disconnecting the ice maker can also be necessary before relocating the refrigerator.
Is it safe to disconnect the ice maker myself?
Disconnecting an ice maker is generally safe if done correctly and following safety guidelines. However, if you are uncomfortable with the process or unsure about it, then I will suggest you to seek professional assistance.
Do I need any special tools to disconnect the ice maker?
You just need some basic tools like pliers, a screwdriver, and an adjustable wrench are often required. I also recommended Safety gear, including gloves and safety goggles.
Is there a specific order for disconnecting the components?
Typically, it’s recommended to start by turning off the water supply, then disconnecting the water line, removing the ice maker unit, and finally disconnecting the power supply.
How do I turn off the water supply to the ice maker?
If the water line is connected to your home’s water supply then locate the shut-off valve, typically near the line or under the sink, and turn it clockwise to shut off the water flow.
Are there any risks involved in disconnecting an ice maker?
While disconnecting an ice maker is generally safe but there are potential risks of electric shocks, water leaks, or damaging components if not done correctly. Always prioritize your safety and follow the proper steps.
Conclusion
Disconnecting your ice maker is a manageable process when approached methodically. Start by unplugging the refrigerator and, if necessary, turn off the water supply. It’s important to remember that reconnecting the ice maker often involves reversing these initial steps. If any part of this process seems daunting or unclear, it’s wise to consider enlisting the expertise of a professional technician who can ensure a secure disconnection.