When you find yourself reaching for some ice to cool down your drink, you typically turn to your Samsung ice maker. However, as you open it up, you notice that the interior is a bit dirty, prompting you to wonder about the best way to clean your Samsung ice maker.
It is quite common for ice makers to accumulate dirt over time, but ensuring proper cleaning is essential for maintaining optimal functionality. Neglecting to clean your ice maker can lead to performance issues, and over time, it may even stop working altogether. Therefore, it is crucial to incorporate regular cleaning into your appliance maintenance routine.
To effectively clean your Samsung ice maker, follow these steps, ensuring a thorough cleaning without risking any damage to your appliance.
Items Needed for Samsung Ice Maker Cleaning
Here is the list of the items you will need to clean your Samsung ice maker. Before you start cleaning the ice maker make sure that you have collected all these items at one place. This will save your time while you clean the ice maker, because you do not have to move here and there to collect the items in between the cleaning.
The items are:-
Warm water
Sponge and soft cloth
Washing powder or dishwasher soap
Cleaning brush
Water and vinegar solution
Lemon
Sanitizing solution
Turn Off the Ice Maker
Before beginning the cleaning process, it is imperative to turn off the Samsung ice maker and unplug it from the wall receptacle. This precautionary step is crucial for safety, because you will work with water and the ice maker is an electric appliance and therefore there is a high chance that you might get an electric shock. Also, there is a high chance that the shock might be life threatening.
After unplugging the ice maker allow the ice maker to cool down for a few minutes before proceeding. It is important because if you put water in hot parts of the ice maker then it can get damaged beyond repair.
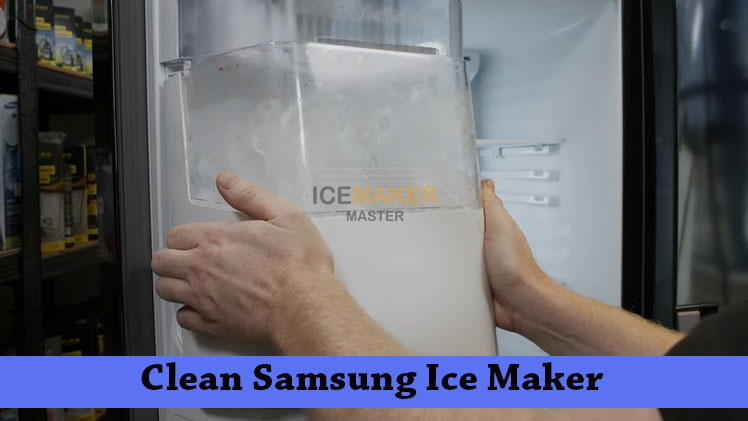
Remove the Ice Bucket
The ice bucket, also known as the ice bin which holds the ice cubes and must be removed before you start the cleaning process. Empty the ice from the bucket, by taking out the ice from it. You can use the ice if you want to use otherwise throw away the ice in the sink.
Also, remove the ice from the ice bin as it makes the cleaning process easy and also saves time because by removing ice you quickly make the ice bin empty otherwise you have to wait for the ice to melt and then you have to clean water from the ice bin.
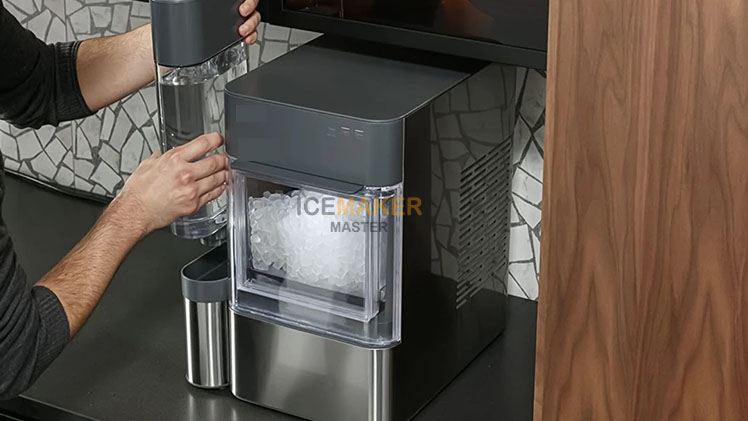
Drain the Water Reservoir
To properly clean the ice maker, ensure that the water reservoir is drained. Move the ice maker to a suitable location, such as a sink, to facilitate water drainage. Remove the plug from the drain port, allowing the water to flow out. Tilt the ice maker to ensure complete water removal from the unit.
After removing water from the water reservoir put the plug back in the drain port. Then put the ice maker back also leave it for a few minutes to air dry it a little bit before you start properly cleaning the ice maker.
Wipe Down the Ice Maker
After draining the water, use a soft cloth to wipe down the interior of the ice maker. Soak the cloth in warm water and repeat the wiping process for thorough cleaning. Put the ice maker aside after completing this step. Let the ice maker air dry for a bit.
Wiping down the interior of the ice maker makes it a little cleaner and it is good for your own health benefits as well.
Also Read - How To Clean Frigidaire Ice Maker?
Clean the Ice Bucket
Focus on cleaning the ice bucket by using a sponge soaked in warm water and dishwasher soap. Scrub the interior of the ice bucket thoroughly to remove dirt and limescale. Utilize a cleaning brush for the exterior and also for those parts where your hands cannot reach.
After this rinse the ice bucket with clean water after scrubbing. Check for any soap residue and ensure it is thoroughly washed away. Otherwise after drying it will smell like soap inside and also it will leave white dirt in the ice bucket.
Prepare the Cleaning Solution
For a thorough cleaning, you have to make a solution by combining water, vinegar, and lemon. This mixture ensures effective cleansing of the water reservoir, ice tray, and your entire ice maker. The combined properties of water and vinegar cut through grime and limescale, while the addition of lemon not only enhances the cleaning power but also leaves a refreshing, odor-neutralizing touch.
This versatile solution provides a holistic cleaning experience, leaving your ice maker pristine and ready for optimal performance.
Clean the Ice Maker
To thoroughly cleanse your ice maker, pour the cleaning solution on the water reservoir, ice tray, and molds. Utilize a sponge and cleaning brush to scrub these components properly, also make sure you have removed any accumulated residue. Following the scrubbing process, rinse the elements with clean water to eliminate all traces of detergent.
After that use a soft cloth to wipe away any lingering detergent, and it will give your ice maker a pristine finish. After that conclude the cleaning routine with a comprehensive wash of the entire ice maker, leaving it not only spotless but also free from any potential contaminants, ready to produce ice in optimal and hygienic conditions.
Sanitize (Optional)
After your ice maker is completely dry, give it an extra clean boost by sanitizing it. Use a sanitizing solution that’s safe for ice makers and approved for food use. This step adds an extra layer of protection by getting rid of any leftover bacteria and ensuring your ice maker is not just visually clean but also safe for making ice. It is a simple way to make sure the ice you use in your drinks is as pure and safe as possible.
Reassemble the Ice Maker
Once you have finished cleaning and sanitizing your ice maker, it is essential to let it air-dry thoroughly before proceeding with reassembly. Allow all the components to dry naturally to ensure that no residual moisture remains. After the drying period, carefully gather all the parts you removed during the cleaning process and meticulously place them back in their respective positions.
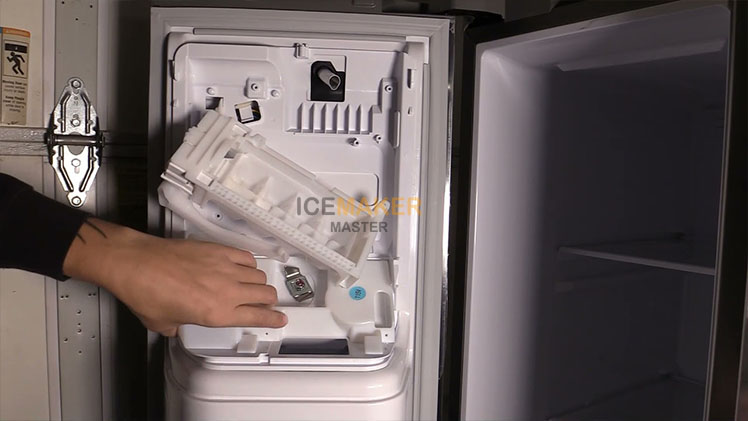
Take your time to ensure each piece is properly aligned and securely fastened. Once reassembled, reconnect the ice maker to the wall receptacle. Conduct a comprehensive check of critical elements, including the water supply, sensor functionality, and water level, to confirm that every aspect is in optimal working condition.
This diligent approach not only contributes to the appliance’s aesthetic cleanliness but also assures its functionality, providing a reliable source of ice for your cooling needs.
Regular Maintenance
Maintaining your Samsung ice maker involves periodic checks for dirt, limescale, leaks, unwanted odors, or any other issues. Regular maintenance helps prevent the need for deep cleaning and ensures that your ice maker functions optimally for an extended period.
Also Read - If you have KitchenAid ice Maker and you donot know how to clean it then here is the guide on How to Clean KitchenAid Ice Maker
FAQ
Why is it important to clean my Samsung ice maker regularly?
Regular cleaning of your Samsung ice maker is crucial to maintain optimal performance, prevent the accumulation of dirt, and ensure the production of clean and safe ice for consumption.
How often should I clean my Samsung ice maker?
It is recommended to clean your Samsung ice maker at least every three to six months, depending on usage and environmental factors. More frequent cleaning may be necessary if you notice any build-up or changes in ice quality.
Can I use regular cleaning agents on my Samsung ice maker?
Yes, you can use mild cleaning agents such as warm water, vinegar, and lemon to clean various components of your Samsung ice maker. Steer clear of utilizing strong chemicals or abrasive substances that may cause harm to the appliance.
Should I unplug the ice maker before cleaning?
Absolutely, it is essential to unplug the ice maker and ensure it is turned off before initiating the cleaning process. This is for your safety and prevents any electrical mishaps during the cleaning procedure.
Is sanitizing my Samsung ice maker necessary?
Sanitizing is an optional step but highly recommended for an extra layer of cleanliness. Use a sanitizing solution approved for food production to eliminate any remaining bacteria, unwanted odors, and ensure a hygienic ice-making environment.
How long should I let my Samsung ice maker dry after cleaning?
Allow all components to air-dry completely before reassembly. The drying time may vary, but ensuring that there is no residual moisture is crucial to prevent mold or mildew growth.
What should I check after reassembling my Samsung ice maker?
After reassembly, reconnect the ice maker to the power source and check the water supply, sensor functionality, and water level. This ensures that the appliance is working correctly and ready to produce ice efficiently.
Conclusion
Remember, your Samsung ice maker is a machine that requires regular care to ensure longevity and efficient performance. By incorporating routine maintenance and periodic deep cleaning, you can keep your Samsung ice maker in top condition, reducing the frequency of more extensive cleaning sessions to four or five times a year. Also, if you keep your ice maker clean then you can enjoy ice whenever you want and you do not have to fear about dirty ice.